Downspout elbow types might confuse you because the two fittings look identical. The difference between an A elbow and a B elbow is simply the direction water turns: A elbows move water toward or away from the wall, and B elbows move it left or right along the wall.
Read on as we walk you through every elbow type, when to use each, and how to install them right.
N Gutter’s Guide:
- A elbow: turns water toward or away from the wall
- B elbow: turns water left or right along the wall
- Standard angle: 75 degrees for most top, bottom, and offset turns
- Standard sizes: 2×3 and 3×4 rectangular; 3-inch and 4-inch round
- Typical downspout: two A elbows, one at the top and one at the bottom
Downspout Elbow Types
An A elbow turns water toward or away from the wall, so it brings the downspout back to the wall at the top and kicks water out at the bottom.
A B elbow turns water sideways along the wall, used when the run must pass a corner, door, or walkway. Most homes need A elbows at standard 75-degree bends.
A Elbows vs B Elbows
An A elbow, sometimes called a front elbow, bends in the same plane as the narrow face of a rectangular downspout, so it turns water front to back.
A B elbow, or side elbow, bends across the wide face, turning the flow left or right. Both are the same slip-fit fitting in the same sizes and angles; only the turn axis changes.
The fastest shelf test: hold the elbow with the openings facing you. If the bend points straight at you, it is an A. If the bend exits to the side, it is a B.
Another tell is the profile itself: A elbows are wider than they are tall, while B elbows are taller than they are wide.
A standard, no-obstruction downspout uses exactly two A elbows: one at the top that brings the pipe from the gutter outlet back flush to the wall, and one at the bottom that turns water out away from the foundation.
You reach for a B only when the path must move sideways. That is why most homes wear A elbows top and bottom, and why the B section at the hardware store sits untouched.
The top of the run shows the system clearly. Water leaves the gutter through the outlet, the first A elbow turns it toward the wall, a short straight section drops to the second A elbow, and that one sets the vertical run flush against the siding.
From there the downspout falls straight until the bottom elbow turns water out onto the splash block or extension.
Read your own house once with this vocabulary and every downspout becomes legible: outlets, elbows, straps, straight sections, and the discharge. Most repairs stop being mysteries the moment you can name the parts.
Elbow Angles: 30, 45, 75, and 90 Degrees
Stock elbows bend about 70 to 75 degrees rather than a full 90 for a reason: a gentler turn lets water accelerate through the curve instead of slamming into a hard corner and backing up, and the softer bend traps less debris, so the joint clogs less often.
Each angle has a job it does best:
| Angle | Best use |
|---|---|
| 30 degrees | The gentlest turn; short distances between fascia and wall, shallow offsets around trim |
| 45 degrees | Upper downspout sections; adds water speed near the outlet to discourage clog formation |
| 75 degrees | The residential default for top turns, bottom kick-outs, and standard offsets |
| 90 degrees | Tight clearances and corners where the run must turn sharply; clogs easiest, so use only where needed |
After twenty years of installations, our advice is simple: default to 75 degrees and only buy another angle when the wall tells you to.
The 90-degree elbow earns its keep in genuinely tight spots, but every sharp turn is a debris shelf.
Sizes, Shapes, and Matching Rules
Rectangular elbows in 2×3 and 3×4 cover most homes, matching the downspouts on K-style gutters.
Round elbows serve round downspouts on half-round systems, and because a round pipe is symmetrical, there is no A or B split; the elbow turns whichever way you aim it.
Commercial and high-capacity residential work adds 4×5 rectangular elbows and larger round sizes to the catalog, paired with the oversized downspouts those roofs demand.
If you encounter 4×5 fittings on a house, it usually means a past installer sized up for a big roof plane, and replacements must match that choice.
The matching rule has no exceptions: elbow size and shape must match the downspout exactly. A 2×3 elbow will not seal on a 3×4 downspout, and a mismatched joint leaks, catches debris, and eventually pulls apart under water weight.
Material matching matters just as much. Aluminum elbows on aluminum downspouts, copper with copper, steel with steel. Mixed metals corrode where they touch.
The Offset (Kick-Out)
The most useful elbow skill is building an offset, sometimes called a kick-out: a jog that moves the downspout out past an obstruction and back to the wall. The construction is two A elbows joined by a short straight section.
The first elbow pushes the pipe out, the filler piece spans the gap, and the second elbow returns the pipe flush to the wall.
- Fit the first A elbow to the pipe above, angled out away from the wall.
- Measure the gap you must clear, then cut a straight section slightly longer so it spans the distance on a downward slope.
- Slip the second A elbow onto the filler, angled back toward the wall.
- Check that the lower elbow lands the pipe flush, then fasten every joint.
Two details make or break an offset. The straight span must pitch downhill so water never ponds in the horizontal stretch, and each joint gets a strap or screw close by so water weight cannot sag the assembly.
To clear a 6-inch soffit, a short filler of a few inches usually suffices; wider bays take a longer straight piece.
Why Elbows Fail Before Downspouts Do
Elbows are the weak points of every downspout run, and the failure modes are predictable. Ladders leaned against the pipe dent elbows first, and a dent creates a shelf inside the bend where debris snags.
Sharp 90-degree turns collect sediment that a 75-degree bend would carry through.
Joint leaks come second. An unfastened or unsupported joint works loose under water weight, and once a seam opens, every storm sprays the wall and soaks the soil right where you least want moisture.
Freeze climates add a third failure: a clog left in an elbow holds water that freezes, expands, and splits the seam from the inside.
None of these require a new downspout. Elbows cost a few dollars each and swap in minutes with a drill and screws, which makes them the highest-value repair part in the whole gutter system.
When You Need a B Elbow
B elbows solve lateral problems. The classic case is a downspout that would discharge onto a driveway or walkway: a B at the bottom turns the flow sideways toward grass or a gravel bed instead.
They also route runs around corners, past doorways, and along walls where the outlet lands on an inside corner. When a run must move sideways and out, combine styles: a B to shift laterally, then A elbows to offset back to the wall.
Mixing A and B in the same downspout leg is normal practice; the choice at each joint depends only on which way the water needs to leave.
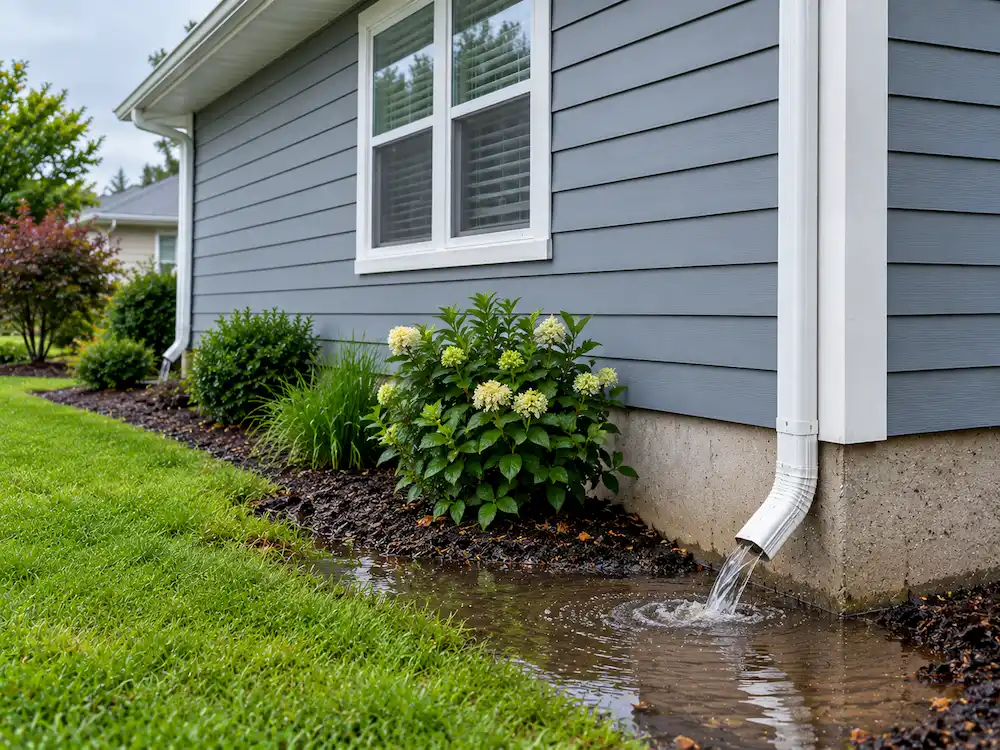
One caution on bottom elbows of either style: mind the ground. The discharge must keep flowing away from the foundation after it exits the elbow, so check the slope of the soil or splash block, not just the fitting’s aim.
A perfectly routed downspout that ends in a puddle at the wall has failed at the last inch.
Buying Elbows
Five checks at the shelf save a second trip. Match the size to your downspout, match the shape (rectangular to rectangular, round to round), pick the A or B style your routing needs, choose the angle the job calls for, and match the material and color to the existing run.
Two details separate good fittings from frustrating ones. Heavier gauge aluminum, .027 or .032 inch, holds its shape against ladders and hail better than the thinnest stock.
And factory-baked finishes outlast touch-up paint by years, so buy the color right rather than planning to spray it later.
Buy one extra elbow per project. They bend easily in the truck, the styles look identical until you hold them up, and the spare costs less than the gas for a return trip to the store.
Replacing a Bad Elbow
The fittings attach with screws or pop rivets, and at the gutter they connect to the outlet piece, sometimes called the drop. Swap a dented or split elbow like this:
Our rain gutter parts article shows how outlets, straps, and elbows fit together if you want the full anatomy before you start.
- Drill out the rivets or remove the screws at both joints.
- Note the crimped end’s direction before you pull the old elbow; the crimped end always points downstream, with the water flow.
- Dry-fit the new elbow and confirm the turn direction is right before fastening.
- Fasten both joints with short sheet-metal screws, one per side minimum.
- Run a hose into the gutter and check each joint for drips.
If the new elbow fits loosely because pipe sizes vary slightly between manufacturers, a few squeezes with a crimping tool tighten the connection.
FAQs
What is the difference between an A and B downspout elbow?
An A elbow turns water toward or away from the wall, front to back. A B elbow turns water left or right along the wall. They are the same fitting in the same sizes and angles; only the bend axis differs.
Why are most gutter elbows 75 degrees instead of 90?
A 75-degree bend lets water accelerate smoothly through the turn instead of hitting a hard corner and backing up, and it traps less debris. Stock 90-degree elbows exist for tight clearances, but every sharp bend raises clog risk, so the trade default is the gentler angle wherever the wall allows it.
Can I mix A and B elbows on the same downspout?
Yes, and installers do it routinely. Use whichever style turns the water the right way at each joint. A common pattern is an A at the top to reach the wall, a B mid-run to clear a corner, and an A at the bottom to kick water away from the foundation.
What size elbow do I need?
Match the downspout exactly: 2×3 inch for 2×3 downspouts, 3×4 for 3×4, and the matching round sizes for round pipe. Measure your downspout before buying, since a mismatched elbow will not seal.
How do I stop elbow joints from leaking?
Fasten every joint with screws or rivets, keep the crimped end pointing downstream, support the run with straps so water weight does not pull joints apart, and seal persistent leakers with exterior gutter sealant.